Hi All,
Have been playing around with the principal of running Xlights / Xschedule on a raspberry pi as an alternative for a dedicated PC for running virtual matrix’s. This is extremely experimental and will probably not work for everyone.
BACKGROUND:
During the year I purchased $6 AUD p4 panels to give them a shot as the price was to good to be true. if you want to check them out you can find them here: https://www.aliexpress.com/item/33021998613.html?spm=a2g0s.9042311.0.0.546f4c4dhLO8LD
From the seller he recommended purchasing linsn sending and receiving cards to drive the panels. (Worst mistake I think I have made in this hobby second to starting the hobby). These linsn cards are just dark magic that requires some serious voodo work to get them to function property. Not only did I find it near impossible to get them working in FPP they randomly stopped working and requires a MAC address that isn’t easy to find.
So that is were the sending card comes into play. The seller recommended to purchase this sending card https://www.aliexpress.com/item/1000001884244.html?spm=a2g0s.9042311.0.0.546f4c4dhLO8LD which takes a DVI input and acts like a secondary monitor to your windows PC. This monitor will display the Panel cabinet size of the 1920×1080 signal for example my test screen is 320(w) x 192(h).
Diagram:
[spoiler]

[/spoiler]
So the idea was to use Xschedule to play a virtual matrix which will send captured video by the sending card to the receiving card and displaying items from a sequence, etc.
MATERIAL LIST:
- Raspberry Pi 4 (Make sure you have a fan / heat sink it gets really hot)
- HDMI TO DVI
- Panels
- Linsn Sending Card
- Linsn Receiving Cards
- USB to Ethernet adapter (Currently the build of Windows ARM does not support the inbuilt ethernet adapter)
- Micro HDMI to HDMI Adapter for Pi
- DVI Cable
SETUP:
This thread has been created to experiment with the principal of Xschedule on a PI. I will post the setup of a Linsn card on a future thread.
1. I Started with grabbing an Image of a very experimental version (not official windows image). There is a team working on a fully supported version of windows ARM however is in its early stages of development. If you would like to try this you can download an experimental version here:
[spoiler]
Currently uploading will add link soon ")
[/spoiler]
2. For this you will require a tool for burning the windows image to an SD Card (equivalent of etcher) WOR TOOL:
[spoiler]
[URL unfurl=”true”]https://www.worproject.ml/downloads[/URL]
[/spoiler]
3. Run through the setup and select the .wim file that was previously downloaded. Tell the installer to get all drivers, etc from the internet. If you can get stuck you can follow this guide
4. Place the sd card into the PI, Connect the usb to ethernet adapter and give it an internet connection.
5. Wait. The installation process of windows onto an SD card is extremely slow and takes a while to expand its file system.
6. Once everything has finished you will be prompted to give it a name and a password.
7. Installation completed.
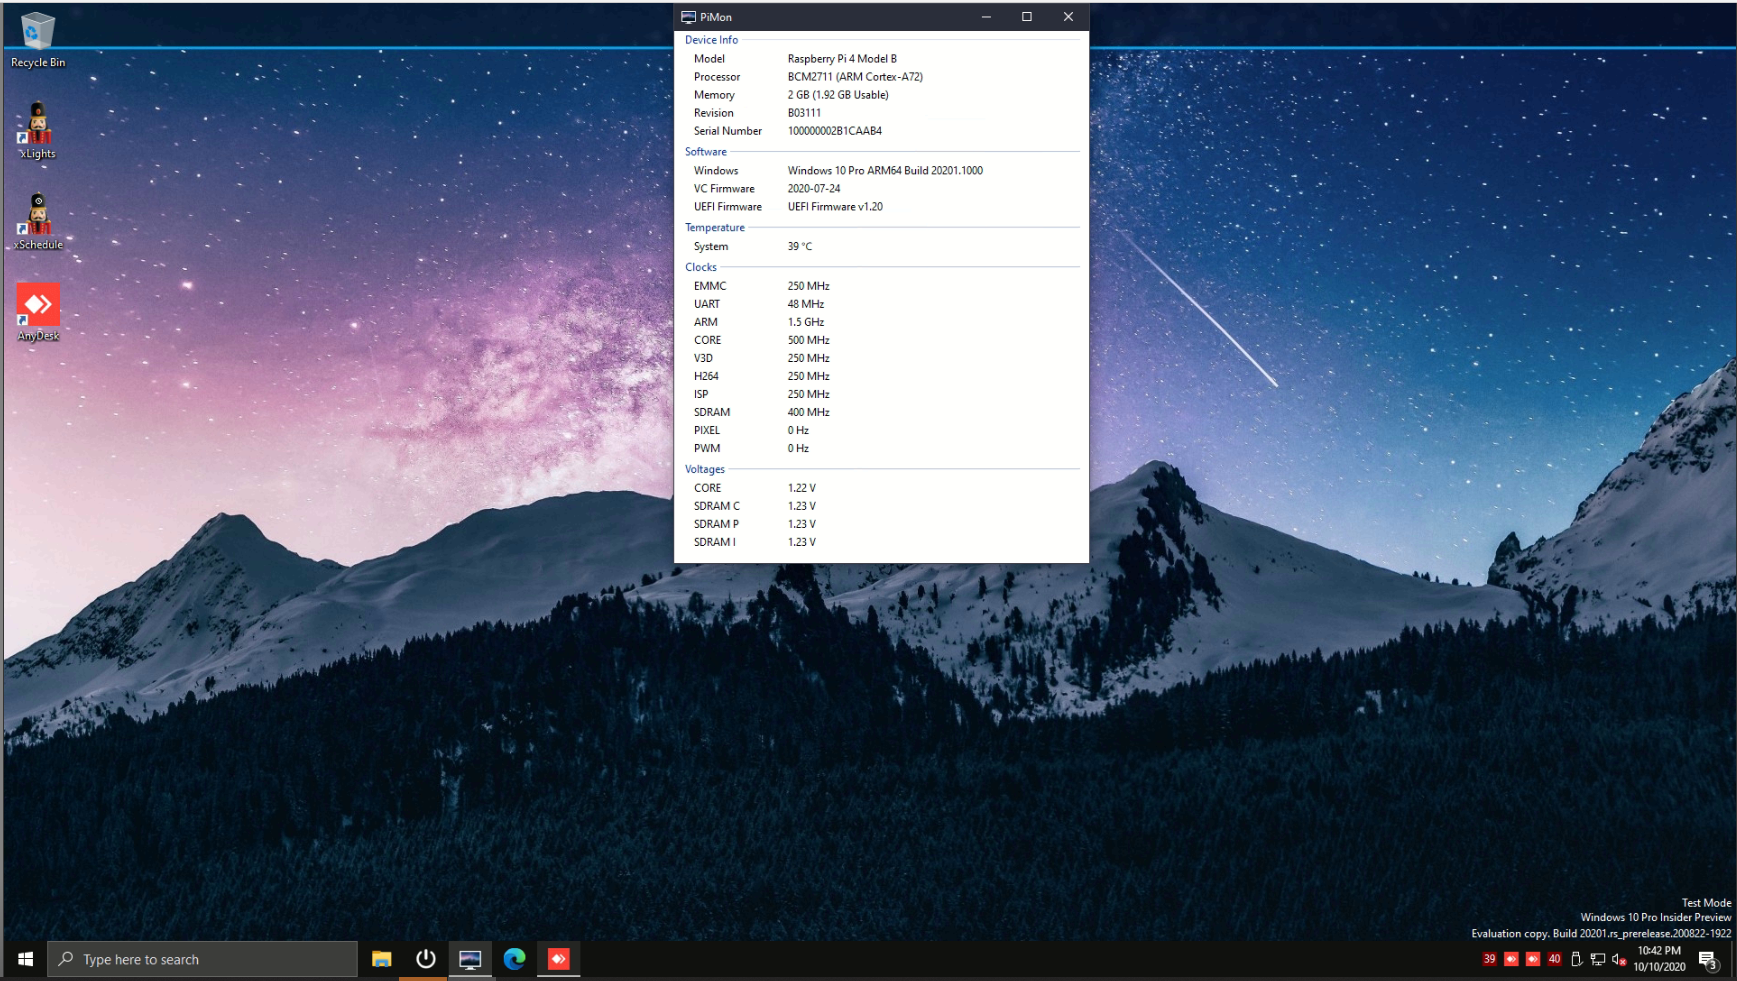
You should now have a working windows ARM image onto your Raspberry Pi Photo:
[spoiler]

[/spoiler]
SOME IMPORTANT NOTES:
– When you normally download a windows executable you download either a 32bit architecture or a 64 bit architecture. A Raspberry Pi is neither a 32 bit or 64 bit architecture it is ARM architecture. This windows images has inbuilt emulators to run only 32 bit images. 64bit programs will refuse to run.
– This image is currently extremely experimental and your results may vary. On idle it was noted that the CPU sat around 12% and 0.8GB ram.
INSTALLING XLIGHTS:
As you normally would I went to xlights.org and found the latest version of 32bit xlights to give it a run. Windows also installed the required C libraries as a standard installation would. That was pretty much it. Everything loaded and operated fine from my quick experimentation. see below:
Xschedule:
[spoiler]

[/spoiler]
Xlights:
[spoiler]

[/spoiler]
Virtual Matrix running:
[spoiler]

[/spoiler]
PERFORMANCE:
From my quick testing on this the performance on a standalone Xschedule with a Virtual matrix is perfectly fine it runs the sequence without any problems. Issues start to commence when you load Xschedule into FPP remote mode and it starts attempting to communicate data. Whilst no Hardware resources are being fully consumed the virtual matrix runs at about 2-3 FPS which is far from ideal. I am currently experimenting to find a way to stop the data transmission from Xschedule during a sequence as when in remote there is large amounts of data being sent and received from the pi for a single matrix (40mbit each way). (Any input would be great to try out).
CONCLUSION:
Currently without to much investigation it doesn’t run as good as FPP which it shouldn’t. FPP is a dedicated linux software kit designed for it. I don’t personally think xschedule / xlights a full scale Windows app was ever intended for this without hardware that the foundation (libraries) of xlights is expecting to see!.
It was fun to experiment this principal as a Pi is is a good cost bracket for a problem like this. As mentioned before this experiment was only because I was sold a Linsn card. (never again ).
Anyway hope you enjoyed the read if you have ever tried this or have any comments post below interesting to try a few more things out.
No responses yet